At this point in the series, your first 5-inch FPV drone is no longer just a collection of parts on the bench.
It has been:
- planned
- assembled
- soldered
- configured
- tested
- flown
- inspected
- maintained
- repaired
This means the drone has already achieved its main purpose:
it became a working learning platform
Now we can start thinking about upgrades.
But upgrades should be approached carefully.
Many beginners make the mistake of adding too many parts too early.
They see videos online and immediately want:
- GPS
- buzzer
- LEDs
- HD video
- action camera
- long-range antennas
- advanced receivers
- high-power VTX
- custom mounts
- every possible accessory
Upgrades can be useful.
But every upgrade adds:
- weight
- wiring
- configuration
- possible failure points
- cost
- troubleshooting complexity
So the goal of this chapter is not to add everything at once.
The goal is to understand which beginner upgrades are actually useful, when to add them, and how they improve your drone.
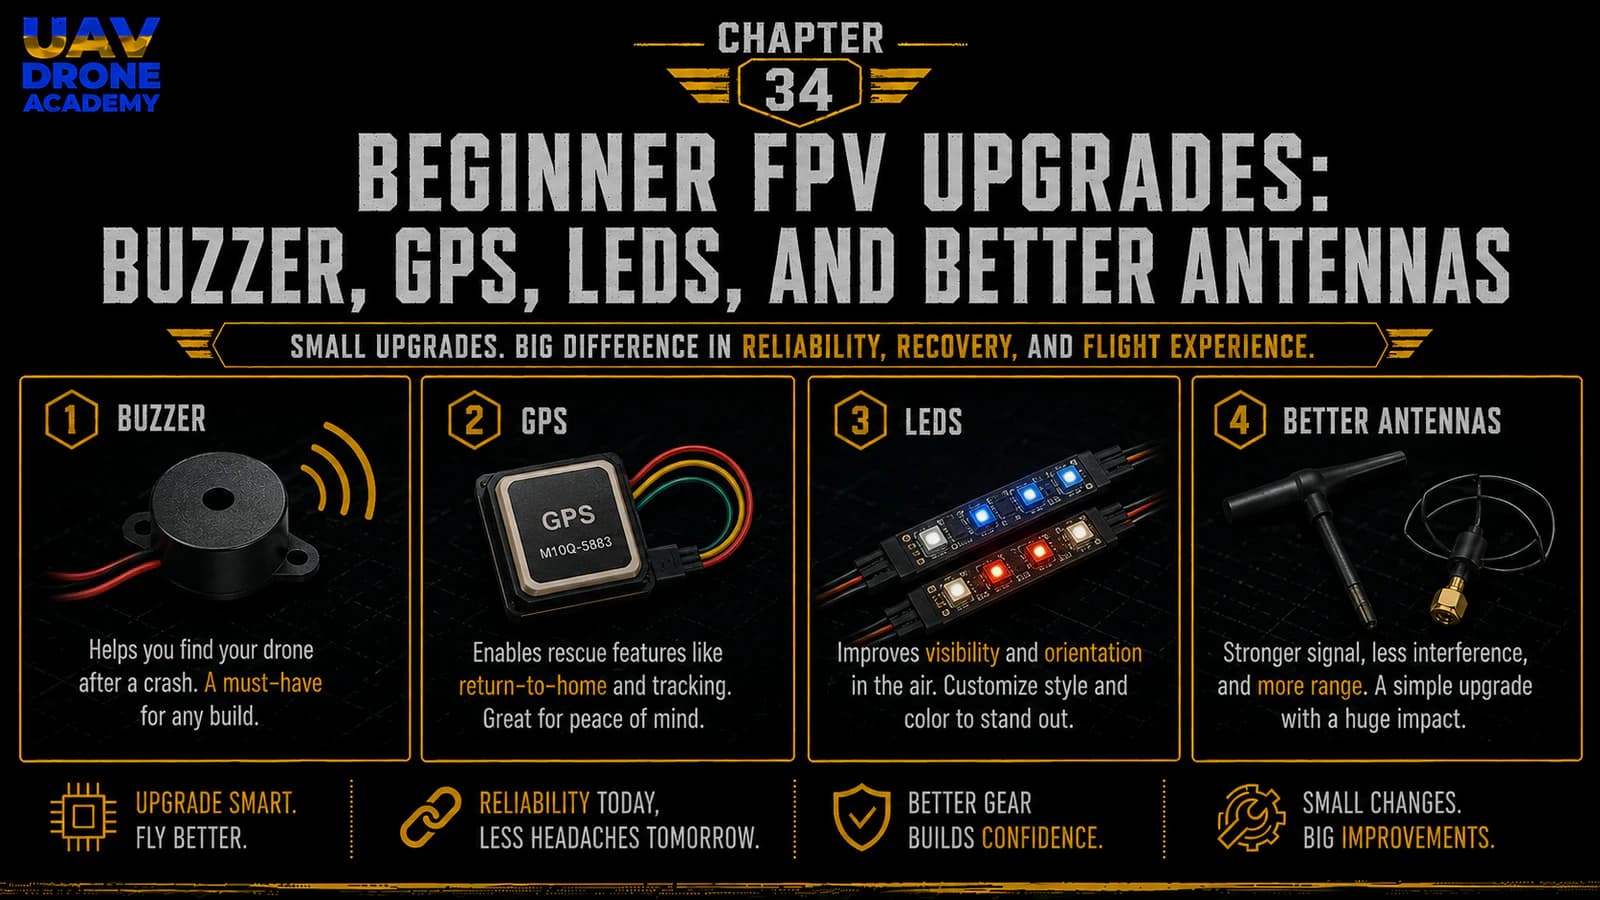
We will focus on four practical upgrades:
- Buzzer
- GPS
- LEDs
- Better antennas
These upgrades can make your drone easier to recover, easier to see, safer to manage, and more reliable in the air.
The Right Upgrade Philosophy
Before buying new parts, ask one question:
what problem does this upgrade solve?
Do not upgrade only because a part looks cool.
Good upgrades solve real problems.
For example:
- a buzzer helps you find the drone after a crash
- GPS can help with position data and advanced recovery features
- LEDs improve visibility and orientation
- better antennas improve video or control link performance
If an upgrade does not solve a problem you actually have, it may not be necessary yet.
Upgrade Slowly
The best beginner upgrade strategy is:
one upgrade at a time
Do not install GPS, buzzer, LEDs, new VTX, new receiver antennas, and digital FPV all in the same weekend.
If something stops working, you will not know which change caused the problem.
Install one upgrade.
Test it.
Confirm it works.
Then move to the next upgrade.
This makes troubleshooting much easier.
Upgrade 1 — Buzzer
A buzzer is one of the most useful beginner upgrades.
Its job is simple:
help you find the drone after a crash
When a drone crashes into grass, bushes, leaves, or uneven terrain, it can be surprisingly hard to find.
Even a bright 5-inch drone can disappear in tall grass.
A buzzer makes sound so you can locate it faster.
Why a Buzzer Matters
A buzzer can help after:
- crashes in grass
- crashes behind obstacles
- video loss
- battery ejection
- landing in bushes
- low-light recovery
- losing visual orientation
Without a buzzer, finding the drone may depend on:
- last DVR view
- motor beeps
- walking the area
- luck
A buzzer makes recovery easier and faster.
Standard Buzzer vs Self-Powered Buzzer
There are two main types of buzzers beginners should know.
Standard Buzzer
A standard buzzer connects to the flight controller.
It makes sound when Betaflight activates it.
This is simple and cheap.
But if the battery disconnects during a crash, the buzzer loses power.
Self-Powered Buzzer
A self-powered buzzer has its own small battery.
It can keep beeping even if the main LiPo disconnects.
This is more useful for crash recovery.
Examples include buzzer modules designed specifically for FPV drone recovery.
For beginners, a self-powered buzzer is often the better upgrade if budget allows.
How a Buzzer Connects
A typical buzzer connects to:
- 5V or buzzer positive pad
- buzzer negative pad
- ground, depending on board design
Many flight controllers have dedicated buzzer pads.
Always check the wiring diagram for your exact flight controller.
Do not guess.
A wrong connection can damage the buzzer or flight controller.
Buzzer Configuration in Betaflight
After wiring the buzzer, Betaflight can control it.
You can assign a Beeper mode to a radio switch.
This allows you to activate the buzzer manually.
A good setup is:
- one switch for Beeper
- easy to reach
- not the same as Arm
- tested before flight
You can also configure buzzer behavior for certain warnings or events.
For beginners, the most important feature is simple:
activate buzzer from the radio after a crash
DShot Beacon vs Physical Buzzer
Some drones can use DShot Beacon.
This makes the motors beep through ESC commands.
This is useful, but it is not the same as a physical buzzer.
DShot Beacon depends on the drone electronics and battery still being connected.
A physical self-powered buzzer is usually better for finding a drone after a battery ejection.
For best recovery, many pilots use both:
- DShot Beacon
- a physical buzzer
But for beginners, start with whichever is easiest and most practical.
Buzzer Installation Tips
When installing a buzzer:
- mount it securely
- protect it from propellers
- keep it away from direct impact if possible
- avoid blocking the sound hole
- secure wires
- test it before flying
- assign it to a switch
- confirm it works after arming and disarming
Do not leave the buzzer loose inside the frame.
A loose buzzer can break wires or create vibration.
Upgrade 2 — GPS
GPS is a more advanced upgrade than a buzzer.
A GPS module allows the drone to receive satellite position data.
This can provide:
- coordinates
- ground speed
- distance from home
- direction to home
- number of satellites
- GPS rescue features in supported configurations
GPS is very useful, but it also adds complexity.
For a beginner 5-inch freestyle drone, GPS is not required for the first flights.
But it can be a good upgrade after the drone is already flying reliably.
Why Add GPS?
GPS can help with:
- locating the drone after a crash
- showing coordinates in the OSD
- understanding distance from takeoff point
- adding GPS Rescue features
- logging position data
- increasing situational awareness
For pilots who fly in larger open areas, GPS can be very useful.
For tight freestyle practice near yourself, GPS is less urgent.
GPS Is Not Magic
Beginners must understand this clearly:
GPS does not make a freestyle drone behave like a DJI camera drone
A GPS-equipped FPV drone still needs:
- proper configuration
- satellite lock
- good antenna placement
- safe testing
- pilot skill
- responsible flying
GPS Rescue is not the same as full autonomous return-to-home on a consumer camera drone.
It can help in certain situations, but it must be configured and tested carefully.
Do not blindly trust GPS Rescue without understanding it.
GPS Module Placement
GPS modules need a clear view of the sky.
Good placement:
- top rear of the drone
- away from carbon fiber blockage
- away from VTX antenna noise
- away from high-current wires
- secured on a mount
- protected from props
Poor placement can cause slow satellite lock or unreliable GPS data.
Carbon fiber can block signal.
Electrical noise can reduce GPS performance.
Placement matters.
GPS Wiring
A GPS module usually uses:
- 5V
- ground
- TX
- RX
It connects to an available UART on the flight controller.
The wiring follows UART logic:
- GPS TX → flight controller RX
- GPS RX → flight controller TX
Then Betaflight must be configured to use that UART for GPS.
This is why we did not use every UART randomly earlier.
Saving UARTs gives room for upgrades.
GPS Configuration in Betaflight
After wiring GPS, Betaflight needs configuration.
Basic steps usually include:
- enable GPS feature
- select the correct UART
- choose the correct GPS protocol if required
- configure OSD GPS elements
- wait for satellite lock outdoors
- test carefully
Do not expect GPS to work well indoors.
GPS needs sky visibility.
For beginners, first confirm that Betaflight sees satellite data before enabling advanced recovery behavior.
Useful GPS OSD Elements
If you add GPS, useful OSD elements may include:
- satellite count
- distance from home
- home direction arrow
- GPS speed
- coordinates
- home position status
Do not add all of them immediately if the OSD becomes crowded.
For beginners, the most useful GPS elements are:
- satellite count
- home direction
- distance from home
- coordinates if flying in areas where recovery may be difficult
GPS Rescue Warning
GPS Rescue can be helpful, but it must be treated carefully.
Before relying on it:
- understand the settings
- test in a safe open area
- verify correct home direction
- confirm satellite lock
- understand how to regain control
- know when it activates
- know how it behaves
Do not enable advanced rescue behavior and assume the drone is automatically safe.
GPS Rescue is an emergency aid, not a replacement for pilot skill.
Upgrade 3 — LEDs
LEDs are not required for flight, but they can be useful.
They can help with:
- visual orientation
- locating the drone
- visibility in low light
- identifying arm status
- making the drone easier to see
- aesthetic customization
For beginners, LEDs are optional.
They are not as important as a buzzer or good antennas.
But they can still be helpful.
Why Add LEDs?
LEDs can help you see:
- where the drone is
- which direction it is facing
- whether it is armed
- whether a mode is active
- where it landed after a crash
They are especially useful for:
- line-of-sight orientation
- dusk flying
- indoor or controlled environments
- visual identification
However, LEDs do not replace good flying habits.
LED Types
There are different LED options:
Simple LEDs
Basic lights powered directly from the drone.
They may stay on whenever powered.
Addressable LEDs
These can be controlled by Betaflight.
They can show colors, patterns, status, and warnings.
Addressable LEDs require proper wiring and configuration.
For beginners, simple LEDs are easier.
Addressable LEDs are more flexible but more complex.
LED Wiring
LED wiring depends on the LED type.
Simple LEDs may only need:
- voltage
- ground
Addressable LEDs usually need:
- 5V
- ground
- signal wire
The signal wire must connect to an LED pad or supported output on the flight controller.
Always check:
- voltage requirement
- current draw
- flight controller support
- wiring diagram
Do not overload the 5V regulator.
Too many LEDs can draw more current than expected.
LED Placement
Good LED placement depends on the goal.
For visibility:
- place LEDs on arms
- rear-facing LEDs can help orientation
- bottom LEDs help when flying overhead
- side LEDs can help line-of-sight visibility
Keep LEDs:
- away from props
- protected from crashes
- securely mounted
- wires secured
- away from hot components
Do not mount LEDs where they can be easily cut by propellers.
Should Beginners Add LEDs Early?
LEDs are fun and useful, but not essential.
For our minimalist beginner build, LEDs were skipped at first because we wanted:
- simpler wiring
- fewer failure points
- lower weight
- cleaner troubleshooting
After the drone is flying reliably, LEDs are a reasonable upgrade.
But they should not be the first priority if you still need:
- spare props
- a buzzer
- better battery straps
- replacement parts
Upgrade 4 — Better Antennas
Better antennas can improve the reliability of your FPV system.
This may include:
- FPV video antennas
- radio receiver antennas
- radio controller antennas
- VTX antenna mounts
- antenna protection
Antenna upgrades are often more useful than beginners expect.
A poor antenna setup can limit video quality and control reliability even if the electronics are good.
FPV Video Antenna Upgrades
For analog FPV, antenna quality matters a lot.
A better VTX antenna can improve:
- video clarity
- signal consistency
- range
- resistance to multipath interference
- durability after crashes
Use matching polarization:
- RHCP with RHCP
- LHCP with LHCP
Do not mix circular polarization types unless you understand the tradeoff.
If your goggles use RHCP antennas, your drone should usually use RHCP too.
If your goggles use LHCP antennas, your drone should usually use LHCP too.
Antenna Polarization
FPV circular polarized antennas usually come in:
RHCP
Right-hand circular polarization.
LHCP
Left-hand circular polarization.
Matching polarization gives better performance.
Mismatched polarization can cause major signal loss.
For beginners, the rule is:
match the drone antenna with the goggle antenna polarization
This simple detail can make a big difference.
Antenna Placement
A good antenna can perform badly if placed poorly.
For the drone antenna:
- keep it away from carbon fiber
- keep it away from props
- avoid sharp bends
- mount it securely
- give it clear exposure
- protect the connector
- avoid placing it directly against high-current wires
For goggles:
- use antennas appropriate for your flying style
- patch antennas can help directional range
- omni antennas help general coverage
- make sure connectors match
Receiver Antenna Upgrades
ExpressLRS receiver antennas also matter.
Depending on the receiver type, you may use:
- ceramic antenna
- T-style antenna
- dipole antenna
- diversity receivers with two antennas
A better antenna setup can improve link reliability.
But placement is just as important as antenna type.
Avoid:
- burying the antenna inside carbon
- placing it next to VTX antenna
- letting it touch props
- damaging the coax
- bending it sharply
Radio Controller Antenna
The radio controller antenna also affects control link performance.
Make sure:
- antenna is installed
- antenna is positioned correctly
- antenna is not damaged
- antenna connector is secure
- antenna matches the module frequency
Never power an external RF module without a proper antenna installed.
Just like a VTX, RF transmitters need suitable antennas.
Antenna Durability
For freestyle drones, antennas take abuse.
Choose antennas that are:
- durable
- easy to mount
- easy to replace
- appropriate for 5-inch freestyle
- not too long
- not too fragile
A very long antenna may improve placement but can be easier to break.
A very short antenna may be durable but can be blocked by the frame.
Balance matters.
Upgrade Priority for Beginners
If you are unsure what to upgrade first, use this order:
1. Spare Propellers and Battery Straps
These are not exciting, but they keep you flying.
2. Buzzer
Helps recover the drone after a crash.
3. Better FPV Antenna
Improves video reliability.
4. Better Receiver Antenna or Mount
Improves radio link reliability and durability.
5. GPS
Useful after the drone is flying reliably.
6. LEDs
Helpful and fun, but optional.
This priority keeps upgrades practical.
Weight Matters
Every upgrade adds weight.
A 5-inch drone can carry extra parts, but weight still affects:
- flight time
- throttle response
- agility
- crash durability
- battery performance
- motor load
Do not add unnecessary weight.
A heavy beginner drone may feel less responsive and crash harder.
Keep upgrades purposeful.
Wiring Complexity Matters
Every new component adds wiring.
More wiring means more chances for:
- loose connections
- solder mistakes
- broken wires
- electrical noise
- troubleshooting confusion
This is another reason to upgrade one system at a time.
Clean wiring matters more than adding features quickly.
Configuration Complexity Matters
Some upgrades require Betaflight configuration.
For example:
- buzzer needs Beeper setup
- GPS needs UART and GPS configuration
- LEDs may need LED Strip configuration
- VTX antenna upgrade may not need software
- receiver antenna upgrade may need physical testing
Before adding an upgrade, understand whether it requires software configuration.
Do not install hardware and assume it will work automatically.
Test After Every Upgrade
After each upgrade, perform a short test.
For example:
After Installing a Buzzer
- test Beeper switch
- test buzzer sound
- test after disarming
- confirm wires are secure
After Installing GPS
- check Betaflight detects GPS
- check satellite count outdoors
- check OSD elements
- test in open area
After Installing LEDs
- confirm power
- check current draw
- verify Betaflight control if addressable
- confirm wires are safe
After Changing Antennas
- check video quality
- check link quality
- inspect mounting
- perform short range test
Do not fly aggressively immediately after an upgrade.
Validate first.
Common Beginner Upgrade Mistakes
Adding Too Much at Once
This makes troubleshooting difficult.
Upgrade one system at a time.
Adding GPS Before Understanding Basic Flight
GPS is useful, but it does not replace flying skill.
Learn the drone first.
Ignoring Weight
Too many accessories can make the drone heavier and less efficient.
Poor Antenna Placement
A good antenna in a bad location performs badly.
Placement matters.
Forgetting to Configure Betaflight
Some upgrades require software setup.
Do not skip configuration.
Powering RF Devices Without Antennas
Never power VTX or RF transmitter modules without proper antennas.
Making the OSD Too Crowded
GPS and link data are useful, but too much OSD information can distract the pilot.
Keep the screen readable.
Beginner Upgrade Checklist
Before upgrading, ask:
- What problem does this upgrade solve?
- Is the drone already flying reliably?
- Do I understand the wiring?
- Do I have the correct voltage?
- Do I have an available UART if needed?
- Will this add too much weight?
- Will this make repairs harder?
- Do I know how to configure it?
- Can I test it safely?
- Do I have a backup of current Betaflight settings?
After upgrading, confirm:
- component powers correctly
- wiring is secure
- no wires touch props
- Betaflight settings are correct
- OSD is not overcrowded
- drone still arms normally
- receiver still works
- video still works
- short test flight is successful
What We Have Completed
At this stage, we have explored the most practical beginner upgrades for a 5-inch FPV drone.
We covered:
- buzzers
- self-powered buzzers
- DShot Beacon
- GPS
- GPS placement
- GPS limitations
- LEDs
- addressable LEDs
- FPV antennas
- receiver antennas
- radio antennas
- upgrade priority
- weight considerations
- wiring complexity
- safe testing after upgrades
The key lesson is simple:
upgrade with purpose
Do not add parts randomly.
A good upgrade makes the drone more useful, more reliable, easier to recover, or easier to fly.
Our Build Philosophy Moving Forward
The philosophy remains:
simple first, useful upgrades later
We started with a minimalist drone because beginners need clarity.
Now that the drone is flying, we can add features that solve real problems.
The drone should evolve slowly.
Each upgrade should make sense.
Each upgrade should be tested.
Each upgrade should keep the drone reliable.
That is how a beginner build becomes a stronger long-term FPV platform.
Conclusion
Beginner FPV upgrades can make your drone more reliable, easier to recover, and more enjoyable to fly.
The most useful early upgrades are:
- a buzzer
- better antennas
- stronger battery straps
- clean antenna mounts
- GPS when you are ready
- LEDs if visibility or orientation is important
But upgrades should not be rushed.
Every new part adds weight, wiring, configuration, and possible failure points.
The best strategy is to upgrade one system at a time, test carefully, and keep the build clean.
A good FPV drone is not the drone with the most accessories.
A good FPV drone is the one that flies reliably, can be repaired easily, and helps you learn.
In the next chapter, we will discuss one of the biggest upgrade decisions many FPV pilots eventually face: moving from analog FPV to digital HD video.
Next Chapter
Analog to Digital FPV Upgrade: When Should You Move to HD?